Difference between revisions of "Cuno Hoffmeister Telescope"
(Created page with "Category:Observatory ====== The Remeis Observatory ====== Information on instruments, techniques and usage can also be found in the Lab Course manual. The domes are buil...") |
|||
| Line 1: | Line 1: | ||
| − | [[Category: | + | [[Category:Current Members]] |
| − | |||
| − | |||
| − | |||
| − | |||
| − | |||
| − | |||
| − | |||
| − | |||
| − | |||
| − | |||
| − | |||
| − | |||
| − | |||
| − | |||
| − | |||
| − | |||
| − | |||
| − | |||
| − | |||
| − | |||
| − | |||
| − | |||
Before starting to observe, remove the caps of the fucuser and the tubus to allow the air to exchange with the surrounding. | Before starting to observe, remove the caps of the fucuser and the tubus to allow the air to exchange with the surrounding. | ||
This is important for a good seeing. | This is important for a good seeing. | ||
| Line 28: | Line 6: | ||
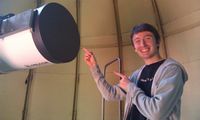
The following pictures illustrate that. | The following pictures illustrate that. | ||
| − | + | [[File:remove_lid_1.jpg|200px]] | |
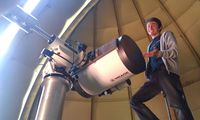
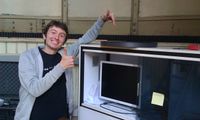
This is Michael. Michael wants to see the stars, but he can't with a metal lid on top. | This is Michael. Michael wants to see the stars, but he can't with a metal lid on top. | ||
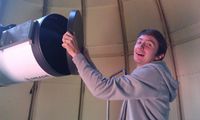
So he geeently | So he geeently | ||
| − | + | [[File:remove_lid_2.jpg|200px]] | |
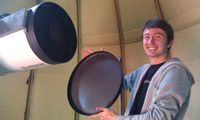
removes it, which looks like that: | removes it, which looks like that: | ||
| − | + | [[File:remove_lid_3.jpg|200px]] | |
The dome is rotated using a heavy, black device with two buttons - self-explanatory. | The dome is rotated using a heavy, black device with two buttons - self-explanatory. | ||
| − | + | == Using the AstroPhysics 1200 GTO mount in the West dome == | |
First of all, a detailed manual is found in the drawer of the table next to the computer. | First of all, a detailed manual is found in the drawer of the table next to the computer. | ||
| Line 47: | Line 25: | ||
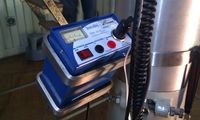
The mount is switched on using the blue power supply attached to the pilar of the mount. | The mount is switched on using the blue power supply attached to the pilar of the mount. | ||
| − | + | [[File:powersupply.jpg|200px]] | |
After switching on the device, the telescope will be found in parking position. | After switching on the device, the telescope will be found in parking position. | ||
| − | + | [[File:parking_pos.jpg|200px]] | |
Objects can be found with a GOTO function. The mount is calibrated two-fold with small wheels measuring the distance driven when slewing the axes: | Objects can be found with a GOTO function. The mount is calibrated two-fold with small wheels measuring the distance driven when slewing the axes: | ||
| − | + | * first the dictance measured by the wheels translated into RA/DEC units of the equatorial coordinate system | |
| − | + | * second the alignment of the telescope's coordinate system with the celestial one | |
Therefore the RA-axis is already adjusted to point to the celestial North-pole. | Therefore the RA-axis is already adjusted to point to the celestial North-pole. | ||
| Line 63: | Line 41: | ||
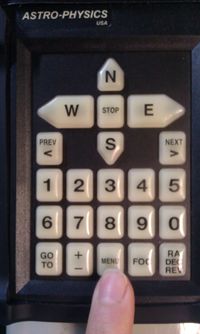
Press | Press | ||
| − | + | [[File:keypad_manu.jpg|200px]] | |
to access the main menu. | to access the main menu. | ||
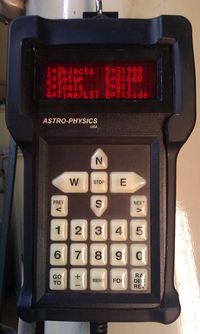
It is arranged as follows: | It is arranged as follows: | ||
| − | + | * '''1-Objects''' | |
| − | + | * '''2-Setup''' | |
| − | + | * '''3-Tools''' | |
| − | + | * '''4-Time/LST''' | |
| − | + | * '''5-S''' | |
| − | + | * '''6-B''' | |
| − | + | * '''7-A''' | |
| − | + | [[File:keypad_mainmenu.jpg|200px]] | |
Pressing the appropriate numbers will lead you to the sub-menus. | Pressing the appropriate numbers will lead you to the sub-menus. | ||
| − | Pressing | + | Pressing '''6''' several times will change the slew rate when steering the mount manually via the E-W-N-S buttons. |
| − | Option | + | Option '''5''' allows to change the slew rate for an automatic driving process when pressing '''GOTO''' after selecting an object. |
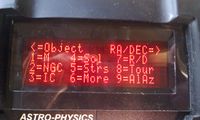
| − | The sub-menu after pressing | + | The sub-menu after pressing '''1''' for '''Objects''' includes amongst other points |
| − | + | * '''1-M''' - Messier catalog | |
| − | + | * '''2-NGC''' - New Galactic Catalog | |
| − | + | * '''3-IC''' - International Catalog | |
| − | + | * '''4-Sol''' - objects of the solar system | |
| − | + | * '''5-Strs''' - list of the brightest stars | |
| − | + | [[File:keypad_objectmenu.jpg|200px]] | |
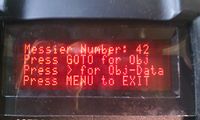
You can directly select objects with well known catalog names using this menu. | You can directly select objects with well known catalog names using this menu. | ||
| − | + | [[File:keypad_objectmenu_messier.jpg|200px]] | |
| − | In the | + | In the '''Strs'''-list you can scroll through the objects via the '''PREV'''- and '''NEXT''' buttons, |
while it is enough to give the appropriate numbers in the other sub-menus. | while it is enough to give the appropriate numbers in the other sub-menus. | ||
| − | In the | + | In the '''Sol''' sub-menu a list is already given and can be chosen with numbers. |
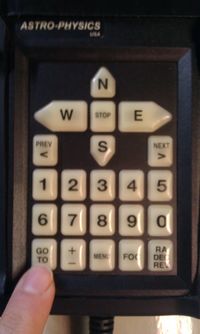
| − | After choosing one object, make the mount drive to it by pressing the | + | After choosing one object, make the mount drive to it by pressing the '''GOTO''' button down left. |
| − | + | [[File:keypad_goto.jpg|200px]] | |
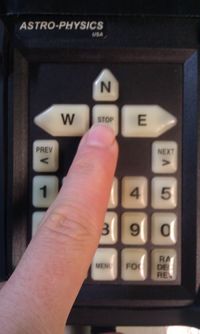
| − | Make sure to be able to press the | + | Make sure to be able to press the '''STOP''' button |
| − | + | [[File:keypad_stop.jpg|200px]] | |
at each time while the telescope is slewing to interrupt the process | at each time while the telescope is slewing to interrupt the process | ||
| Line 110: | Line 88: | ||
After the telescope has focused the chosen object, make sure that it is properly centered in the field of view. | After the telescope has focused the chosen object, make sure that it is properly centered in the field of view. | ||
| − | Therefore use one of the oculars and the wheels at the focuser to focus the stars (see also [[ | + | Therefore use one of the oculars and the wheels at the focuser to focus the stars (see also [[Bahtinov mask]] for focusing the telescope properly). |
If not use the N-S-E-W buttons to correct for that. The chosen position is automatically tracked by the mount. | If not use the N-S-E-W buttons to correct for that. The chosen position is automatically tracked by the mount. | ||
After centering the object manually, you can re-calibrate the internal coordinate-system to the celestial one | After centering the object manually, you can re-calibrate the internal coordinate-system to the celestial one | ||
| − | by choosing the option | + | by choosing the option '''Ra/Dec REV''' and '''Recalibrate''' while beeing in the main menu. |
| − | When finished, return the mount in parking position choosing the menu | + | When finished, return the mount in parking position choosing the menu '''Setup''' and '''Park Mount'''. |
| − | The best position is position | + | The best position is position '''1'''. |
Here, the right ascension axis is oriented in E-W direction with the tubus in the West pointing North. | Here, the right ascension axis is oriented in E-W direction with the tubus in the West pointing North. | ||
| − | + | ''tb'' | |
| − | + | == Using the Telrad-finder == | |
The Telrad finder projects three concentric circles (similar to a head up-display). So you have a good overview where the telescope points, and if with a little experience you can find a lot of objects just by using the Telrad. | The Telrad finder projects three concentric circles (similar to a head up-display). So you have a good overview where the telescope points, and if with a little experience you can find a lot of objects just by using the Telrad. | ||
| − | + | * rotate the turn-switch on the right side of the Telrad to activate the power supply and to tune the luminosity. | |
| − | + | * press the yellow button on the right side of the Telrad. The LED light will we activated for a short span of time (so the batteries won't become empty if you forget to switch it off). | |
| − | + | == Focusing == | |
The 40cm telescope can be focused using the wheels next to the focuser. The big wheels for raw-focusing and the smaller | The 40cm telescope can be focused using the wheels next to the focuser. The big wheels for raw-focusing and the smaller | ||
whell attached on only one side for vernier adjustment. | whell attached on only one side for vernier adjustment. | ||
| Line 138: | Line 116: | ||
When moving the main mirror it is best to point the telescope to a position high in the sky, low declinations should be avoided because it would boost the risk of a stuck mirror. | When moving the main mirror it is best to point the telescope to a position high in the sky, low declinations should be avoided because it would boost the risk of a stuck mirror. | ||
| − | + | == Focusing using the Bahtinov mask == | |
| − | + | [[File:bahtinov_mask_setup.gif|332px]] | |
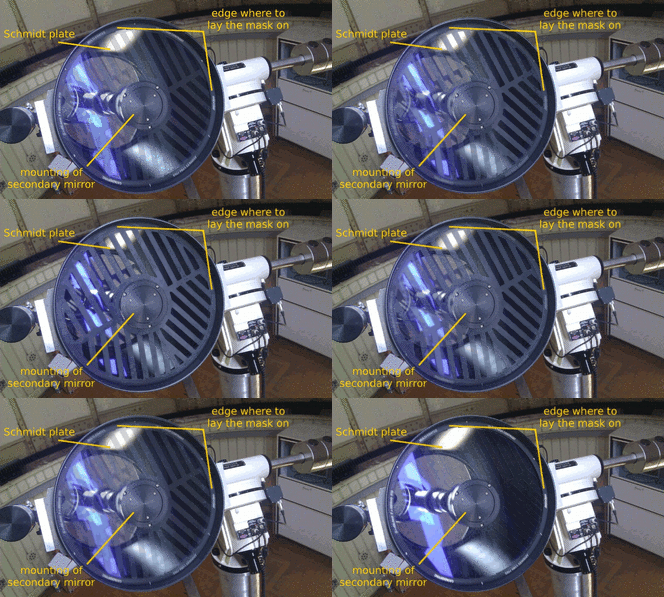
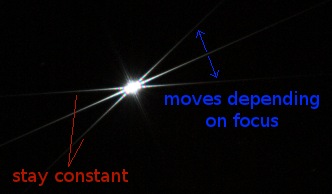
| − | Up in the west dome there is a so called | + | Up in the west dome there is a so called [http://en.wikipedia.org/wiki/Bahtinov_mask Bahtinov mask] available, which makes the focusing much easier. Normally, the focus is varried until one (or more) star is sharpest, i.e. smallest, on the picture (if using a CCD camera). This method, however, depends on the seeing conditions: a bad seeing causes the image of the star to "wobble", making focusing very difficult. In a worst case, the star isn't focused well, which would result in an unsharpen image after a long exposure. |
The Bahtinov mask gets rid of the seeing problem by creating 3 diffraction pattern via a grid. Two pattern cross the image at the center, while the position of the third one depends on the focus: if the image is defocused, the diffraction spike is off the center. On the other hand, if the perfect focus is found, all 3 diffraction pattern cross at the same point in the center. | The Bahtinov mask gets rid of the seeing problem by creating 3 diffraction pattern via a grid. Two pattern cross the image at the center, while the position of the third one depends on the focus: if the image is defocused, the diffraction spike is off the center. On the other hand, if the perfect focus is found, all 3 diffraction pattern cross at the same point in the center. | ||
| − | The Bahtinov mask has to be put on top of the Schmidt plate, before the telescope. The diameter of the mask is slightly smaller then the outer radius of the tube. In consequence, the mask is hold by the casing of the tube itself. Please | + | The Bahtinov mask has to be put on top of the Schmidt plate, before the telescope. The diameter of the mask is slightly smaller then the outer radius of the tube. In consequence, the mask is hold by the casing of the tube itself. Please '''be careful''' not to scratch the Schmidt plate while using the Bahtinov mask! |
| − | + | [[File:bahtinov_mask.jpg|332px]] | |
| − | + | == CCD camera SBIG STL-11000M == | |
The CCD camera is located in the lockers of the Meridian building (black box). | The CCD camera is located in the lockers of the Meridian building (black box). | ||
| Line 158: | Line 136: | ||
Inside the board next to the computer | Inside the board next to the computer | ||
| − | + | [[File:pc_dome.jpg|200px]] | |
there is a quite long USB cable that also has to be connected to the CCD camera. | there is a quite long USB cable that also has to be connected to the CCD camera. | ||
| Line 165: | Line 143: | ||
Now type: | Now type: | ||
| − | + | <pre>setenv VBOX_USB sysfs</pre> | |
into the terminal! | into the terminal! | ||
| − | Now you can log-in, open a shell and run the command | + | Now you can log-in, open a shell and run the command '''VirtualBox''' which opens a Windows XP emulation within Linux. |
Now the fan inside the camera will start to run. | Now the fan inside the camera will start to run. | ||
| − | Open the program | + | Open the program '''CCDops''' which communicates with the camera. |
| − | Click on the menu point | + | Click on the menu point '''Setup''' and a connection between the CCD camera and your machine will be established. |
| − | Click again on Setup, set the | + | Click again on Setup, set the <br />cooling<br /> to "active" and the desired temperature to -20 degrees. |
This will attenuate thermal noise of the CCD chip. | This will attenuate thermal noise of the CCD chip. | ||
| − | The | + | The <br />resolution mode<br /> should be set to "auto" which will automatically use the high resolution mode for grabed pictures |
| − | and low resolution elsewhere. The | + | and low resolution elsewhere. The <br />binning<br /> can be set to "1" for the most information inside the picture. |
For larger binning more pixels will be averaged to one to save memory. | For larger binning more pixels will be averaged to one to save memory. | ||
It is also possible to extract only parts of the CCD in the appropriate menu to save time to transfer the data. | It is also possible to extract only parts of the CCD in the appropriate menu to save time to transfer the data. | ||
First make sure that the detector is located in the focal plane. Therefore use the Bathinov mask and center the brightest star available. | First make sure that the detector is located in the focal plane. Therefore use the Bathinov mask and center the brightest star available. | ||
| − | In CCDops choose | + | In CCDops choose '''Focus''' from the manu bar. This mode allows to continously transfer low resolution images with short exposure times |
(fractions of a second), which takes less time to transfer the accumulated data from the camera to the computer. | (fractions of a second), which takes less time to transfer the accumulated data from the camera to the computer. | ||
Now you can check changes in the diffraction pattern of the star using the Bathinov mask with changes in the focus nearly in real time. | Now you can check changes in the diffraction pattern of the star using the Bathinov mask with changes in the focus nearly in real time. | ||
When reached the desired diffraction pattern, pause the data traffic and quit the appropriate window. | When reached the desired diffraction pattern, pause the data traffic and quit the appropriate window. | ||
| − | Now you can start taking proper images using the | + | Now you can start taking proper images using the '''Grap''' option in the main menu. |
Choose a suitable exposure time that depends on the brightness of the source. | Choose a suitable exposure time that depends on the brightness of the source. | ||
Right click on the image when downloaded and a cross-hair appears. It gives back the pixel values in ADU units that should not exceed 65,000 | Right click on the image when downloaded and a cross-hair appears. It gives back the pixel values in ADU units that should not exceed 65,000 | ||
| Line 191: | Line 169: | ||
The exposure time should not exceed 150s as the tracking of the mount will get inaccurate at that point. | The exposure time should not exceed 150s as the tracking of the mount will get inaccurate at that point. | ||
| − | In the drop-down menu you can also choose | + | In the drop-down menu you can also choose '''filters'''. For black and white images simply use the "clear" filter. |
The best way to go is to measure both a dark frame and a proper frame at each time depending on how many frames you want to measure. | The best way to go is to measure both a dark frame and a proper frame at each time depending on how many frames you want to measure. | ||
| Line 208: | Line 186: | ||
Frames can be stored to a shared directory within the Virtual Machine. | Frames can be stored to a shared directory within the Virtual Machine. | ||
This shared directory is accessable from the Linux machine at | This shared directory is accessable from the Linux machine at | ||
| − | reticulum:/scratch1/VirtualBox/... | + | <code>reticulum:/scratch1/VirtualBox/...</code> |
| − | |||
| − | / | ||
| − | |||
| − | |||
| − | |||
| − | |||
| − | |||
| − | |||
| − | |||
| − | |||
| − | |||
| − | |||
| − | |||
| − | |||
| − | |||
| − | |||
| − | |||
| − | |||
| − | |||
| − | |||
| − | |||
| − | |||
| − | |||
| − | |||
| − | |||
| − | |||
| − | |||
| − | |||
| − | |||
| − | |||
| − | |||
| − | |||
| − | |||
| − | |||
| − | |||
Revision as of 15:53, 20 April 2018
Before starting to observe, remove the caps of the fucuser and the tubus to allow the air to exchange with the surrounding. This is important for a good seeing. The tubus' cap must be removed gently and must not be fully pressed over the tubus when finished as the mount can be damaged when pulling and pushing too hard. The following pictures illustrate that.
This is Michael. Michael wants to see the stars, but he can't with a metal lid on top. So he geeently
removes it, which looks like that:
The dome is rotated using a heavy, black device with two buttons - self-explanatory.
Using the AstroPhysics 1200 GTO mount in the West dome
First of all, a detailed manual is found in the drawer of the table next to the computer.
The mount is switched on using the blue power supply attached to the pilar of the mount.
After switching on the device, the telescope will be found in parking position.
Objects can be found with a GOTO function. The mount is calibrated two-fold with small wheels measuring the distance driven when slewing the axes:
- first the dictance measured by the wheels translated into RA/DEC units of the equatorial coordinate system
- second the alignment of the telescope's coordinate system with the celestial one
Therefore the RA-axis is already adjusted to point to the celestial North-pole. The telescope's coordinate system should also accord to the celestial one.
The usage of the keypad menu is more or less straightforward. Press
to access the main menu. It is arranged as follows:
- 1-Objects
- 2-Setup
- 3-Tools
- 4-Time/LST
- 5-S
- 6-B
- 7-A
Pressing the appropriate numbers will lead you to the sub-menus. Pressing 6 several times will change the slew rate when steering the mount manually via the E-W-N-S buttons. Option 5 allows to change the slew rate for an automatic driving process when pressing GOTO after selecting an object.
The sub-menu after pressing 1 for Objects includes amongst other points
- 1-M - Messier catalog
- 2-NGC - New Galactic Catalog
- 3-IC - International Catalog
- 4-Sol - objects of the solar system
- 5-Strs - list of the brightest stars
You can directly select objects with well known catalog names using this menu.
In the Strs-list you can scroll through the objects via the PREV- and NEXT buttons, while it is enough to give the appropriate numbers in the other sub-menus. In the Sol sub-menu a list is already given and can be chosen with numbers.
After choosing one object, make the mount drive to it by pressing the GOTO button down left.
Make sure to be able to press the STOP button
at each time while the telescope is slewing to interrupt the process in case of tightening cables (also pay attention to the motor-cables of the mount), things or humans that could be hit by the driving telescope or whatever.
After the telescope has focused the chosen object, make sure that it is properly centered in the field of view. Therefore use one of the oculars and the wheels at the focuser to focus the stars (see also Bahtinov mask for focusing the telescope properly). If not use the N-S-E-W buttons to correct for that. The chosen position is automatically tracked by the mount. After centering the object manually, you can re-calibrate the internal coordinate-system to the celestial one by choosing the option Ra/Dec REV and Recalibrate while beeing in the main menu.
When finished, return the mount in parking position choosing the menu Setup and Park Mount. The best position is position 1. Here, the right ascension axis is oriented in E-W direction with the tubus in the West pointing North.
tb
Using the Telrad-finder
The Telrad finder projects three concentric circles (similar to a head up-display). So you have a good overview where the telescope points, and if with a little experience you can find a lot of objects just by using the Telrad.
- rotate the turn-switch on the right side of the Telrad to activate the power supply and to tune the luminosity.
- press the yellow button on the right side of the Telrad. The LED light will we activated for a short span of time (so the batteries won't become empty if you forget to switch it off).
Focusing
The 40cm telescope can be focused using the wheels next to the focuser. The big wheels for raw-focusing and the smaller whell attached on only one side for vernier adjustment.
Furthermore it is often necessary to even move the mirror when switching between oculars and the CCD camera. This can be done with a long silver screw after loosening the knob next to it to position "unlock". When finished arrest the mirror again. When moving the main mirror it is best to point the telescope to a position high in the sky, low declinations should be avoided because it would boost the risk of a stuck mirror.
Focusing using the Bahtinov mask
Up in the west dome there is a so called Bahtinov mask available, which makes the focusing much easier. Normally, the focus is varried until one (or more) star is sharpest, i.e. smallest, on the picture (if using a CCD camera). This method, however, depends on the seeing conditions: a bad seeing causes the image of the star to "wobble", making focusing very difficult. In a worst case, the star isn't focused well, which would result in an unsharpen image after a long exposure.
The Bahtinov mask gets rid of the seeing problem by creating 3 diffraction pattern via a grid. Two pattern cross the image at the center, while the position of the third one depends on the focus: if the image is defocused, the diffraction spike is off the center. On the other hand, if the perfect focus is found, all 3 diffraction pattern cross at the same point in the center.
The Bahtinov mask has to be put on top of the Schmidt plate, before the telescope. The diameter of the mask is slightly smaller then the outer radius of the tube. In consequence, the mask is hold by the casing of the tube itself. Please be careful not to scratch the Schmidt plate while using the Bahtinov mask!
CCD camera SBIG STL-11000M
The CCD camera is located in the lockers of the Meridian building (black box). It brings the CCD camera itself and a power cable that has to be connected to a power socket. Make sure that the transformator box attached to the power cable is fixed to the pillar as the cable might get too short if the box would lie on the floor. Inside the board next to the computer
there is a quite long USB cable that also has to be connected to the CCD camera. The camera itself is connected to the focuser of the telescope with the upper side of the chassis pointing North indicated by the elongation of the RA-axis pointing to the North pole.
Now type:
setenv VBOX_USB sysfs
into the terminal!
Now you can log-in, open a shell and run the command VirtualBox which opens a Windows XP emulation within Linux.
Now the fan inside the camera will start to run.
Open the program CCDops which communicates with the camera.
Click on the menu point Setup and a connection between the CCD camera and your machine will be established.
Click again on Setup, set the
cooling
to "active" and the desired temperature to -20 degrees.
This will attenuate thermal noise of the CCD chip.
The
resolution mode
should be set to "auto" which will automatically use the high resolution mode for grabed pictures
and low resolution elsewhere. The
binning
can be set to "1" for the most information inside the picture.
For larger binning more pixels will be averaged to one to save memory.
It is also possible to extract only parts of the CCD in the appropriate menu to save time to transfer the data.
First make sure that the detector is located in the focal plane. Therefore use the Bathinov mask and center the brightest star available. In CCDops choose Focus from the manu bar. This mode allows to continously transfer low resolution images with short exposure times (fractions of a second), which takes less time to transfer the accumulated data from the camera to the computer. Now you can check changes in the diffraction pattern of the star using the Bathinov mask with changes in the focus nearly in real time. When reached the desired diffraction pattern, pause the data traffic and quit the appropriate window.
Now you can start taking proper images using the Grap option in the main menu. Choose a suitable exposure time that depends on the brightness of the source. Right click on the image when downloaded and a cross-hair appears. It gives back the pixel values in ADU units that should not exceed 65,000 in order not to overexposure the image. The exposure time should not exceed 150s as the tracking of the mount will get inaccurate at that point.
In the drop-down menu you can also choose filters. For black and white images simply use the "clear" filter.
The best way to go is to measure both a dark frame and a proper frame at each time depending on how many frames you want to measure. Afterwards one can substract the dark frame (shutter closed) from the illuminated frame in order to get rid of detector internal bias. This bias is thermal noise also called dark current. Then one can add and average as many substracted frames as necessary to reduce statistical noise from the images.
You can also measure a fully illuminated frame and dark frame in one step. The software will automatically substract both and show you the final image. It is, however, better to store both separately to be able to see and better control the effects of correction.
When finished with the observing session, a flat field should be measured. Therefore use the white flat field mask, steer the tubus in an upright position and just put it on top. A proper exposure time is 0.1s. A flat field is good to correct for non uniform distributed pixel responses. It will at the end be multiplied with the dark-substracted images.
Frames can be stored to a shared directory within the Virtual Machine.
This shared directory is accessable from the Linux machine at
reticulum:/scratch1/VirtualBox/...
